Colophon
How this website is made
The stack, tools, and decisions behind building this site.
As a software engineer, I spent years contributing to Stack Overflow, with some of my best answers becoming posts in this website.
Over time, this space has evolved into something more personal: a place where I now share my photos, which have become such an important part of my life outside of work. I treat this website as a craft, the same way I approach photography.
Contents
Technology stack #
This website is built with modern web technologies:
- Hugo: Static website generator, written in Go.
- Tailwind CSS: Utility-first CSS framework.
- Alpine.js: Minimal framework for composing behavior in the HTML markup.
- Fancybox: Lightbox for full-screen image viewing.
- Custom image processing pipeline: A Python orchestrator that drives native binaries (
libvips,mozjpeg,cwebp,avifenc,colorthief-cli,ssimulacra2) to balance visual fidelity with file size.
Infrastructure #
To keep things as simple as possible, the entire infrastructure is currently kept under Cloudflare:
- Deployment and hosting: Automated builds via Cloudflare Pages.
- Storage: Image assets served from Cloudflare R2.
- Network: Domain and DNS managed by Cloudflare.
Privacy #
I take privacy seriously. This website has no trackers or ads and doesn’t collect or store any data about your visit. The only personal information I receive is what you voluntarily share through the contact form.
For details about how I handle photography in public spaces and image removal requests, see my full privacy and image policy.
Photography workflow #
All pictures here are mine, shot with Sony and Fujifilm cameras. My two favourites are the Sony α1 II paired with the Sony 300mm f/2.8 GM, and the Fujifilm X100V.
I shoot both raw and JPEG with both systems, but I have different workflows for each.
With Sony, images go through Photo Mechanic for culling, then DxO PureRAW for noise reduction and lens corrections, before landing in Lightroom Classic for editing. If I want to share something quickly, I use the JPEGs straight out of the camera and do some basic cropping and straightening in Lightroom. Sony colours hold up well.
With Fujifilm, I often import the JPEGs into Lightroom for some basic cropping and straightening as needed. I rarely do any other editing as the Fujifilm colours are hard to beat. I don’t edit the raw files at all, but I keep them as a backup in case I want to revisit the images later.
The final images are then exported from Lightroom and processed through my custom image pipeline for publishing.
I’d rather own my software than rent it, so I’m moving away from Lightroom. I’m currently experimenting with DaVinci Resolve Studio 21 and its newly released Photo page, which looks promising so far.
Image processing pipeline #
Getting photos to look good and load fast is trickier than it sounds. I’m picky about image quality, but I also don’t want images taking long to load, especially on slower connections.
And I’ve been through some rabbit holes trying to find the right balance between visual fidelity and file size. I could have offloaded this to an image hosting service, but I wanted full control without the cost.
The problem #
At first, I attempted to use the same compression settings for every photo.
And, unsurprisingly, that didn’t work well.
I immediately noticed detailed shots needed higher quality to avoid artifacts, while simple compositions could be compressed more without anyone noticing. Some files ended up unnecessarily large, others lost too much quality.
The solution #
Manually fine-tuning the quality settings per image per resolution per format is impractical. So I built a pipeline that handles it for me, optimising each image individually using SSIMULACRA2, a perceptual quality metric that scores how closely the compressed version matches the original.
How it works #
Each photo goes through the pipeline and comes out in three formats: JPEG, WebP, and AVIF, at multiple sizes, from small thumbnails up to large screen resolutions.
The downscaling and colour profile conversion to sRGB are handled by libvips. Then native encoders are used for
outputting each format:
| Format | Encoder |
|---|---|
| JPEG | mozjpeg |
| WebP | cwebp |
| AVIF | avifenc |
For each variant, the encoder iterates until the output reaches a target SSIMULACRA2 score. I usually aim at 80, which
sits at the balanced point between file size and fidelity. A score of 90 is effectively indistinguishable from the
original at 1:1; 70 is still high quality but trades some fidelity for a smaller file. The scoring is handled by
libjxl’s ssimulacra2 tool.
Each processed variant gets a hash fingerprint in its filename, which lets me use aggressive caching while still handling cache invalidation cleanly if an image ever needs to be reprocessed.
The processed variants, in multiple formats and resolutions, are then uploaded to Cloudflare R2.
As part of the image processing, the dominant colour and palette are extracted from each image using colorthief-cli.
The dominant colour is used as a placeholder while the image loads in the website. And I have yet to find a use for
the colour palette.
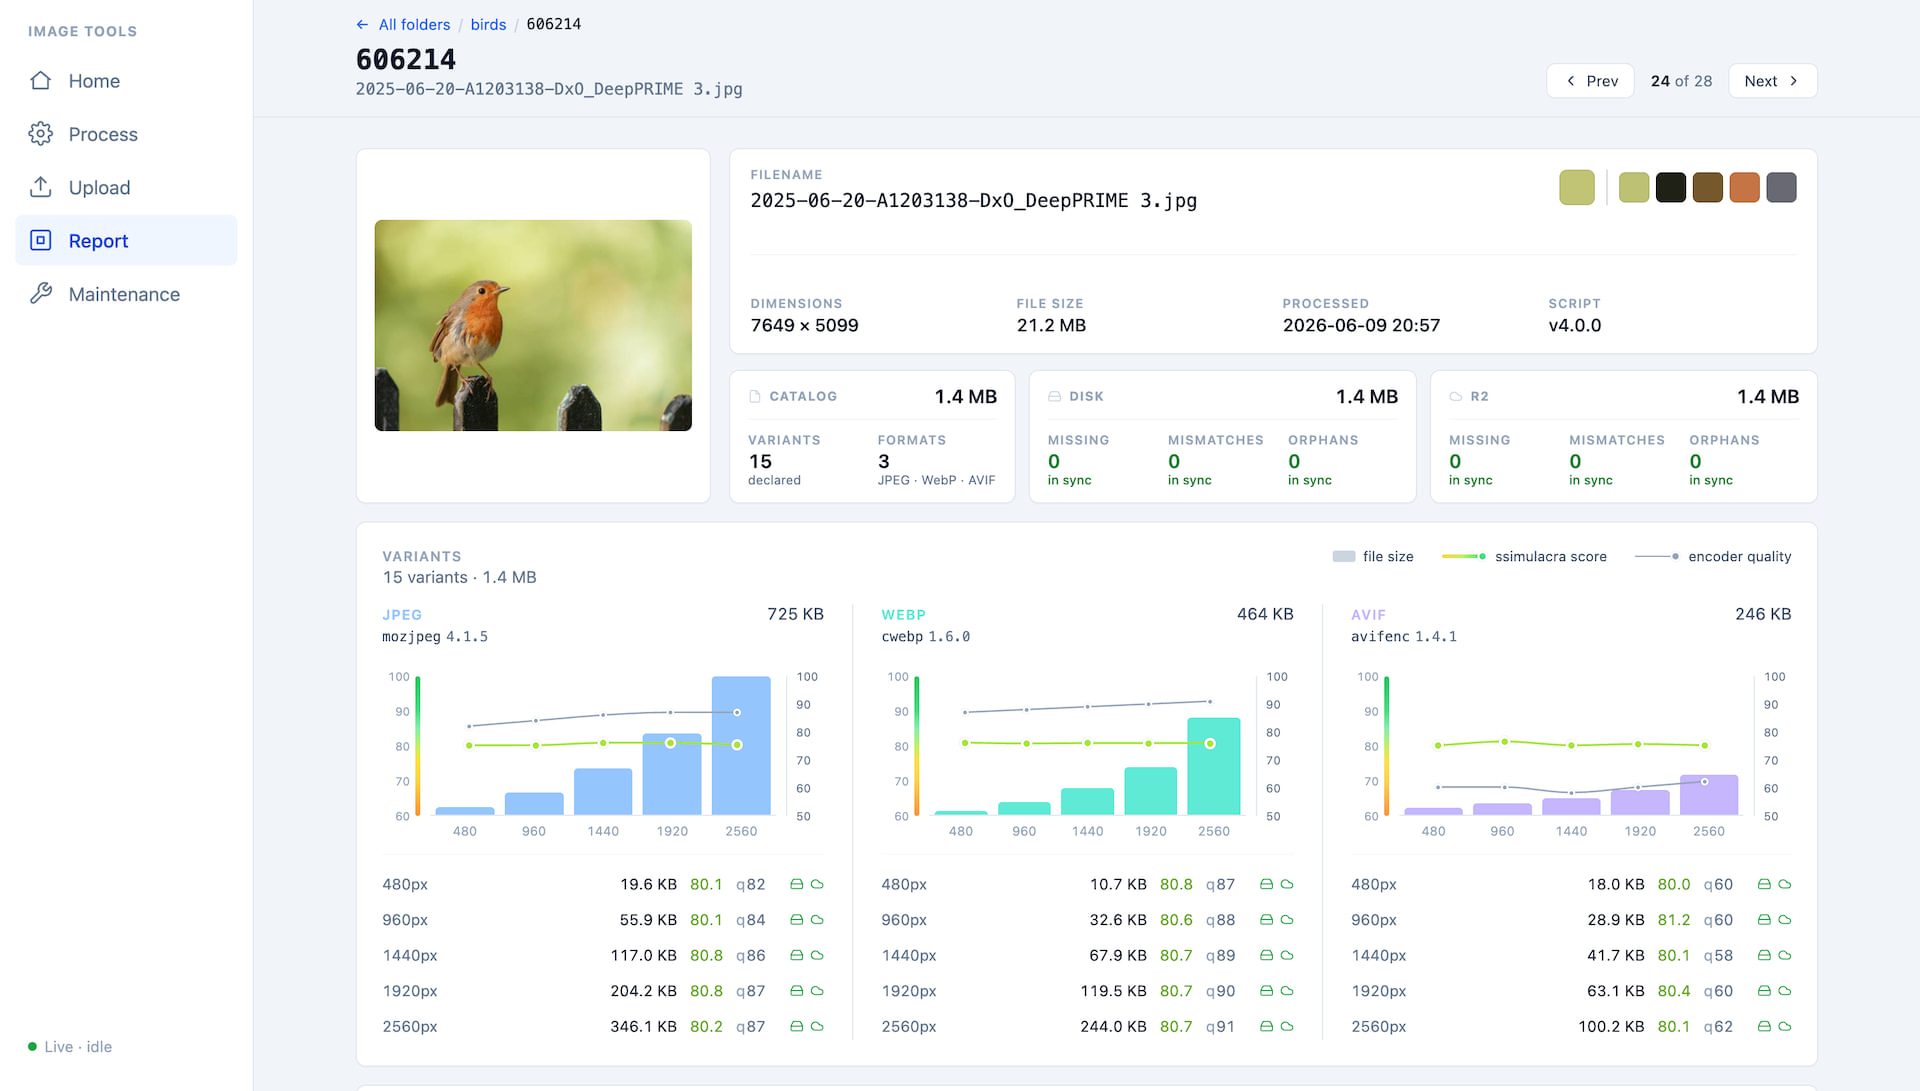
Details about each processed image (file names, hashes, formats, dominant colour and palette, SSIMULACRA2 score, encoder versions, encoding parameters, dimensions, and more) are stored in YAML files that Hugo reads at build time to generate the gallery pages.
When you access a gallery, the browser picks the best format and size for your screen. While images load (which should be snappy), the gallery shows each photo’s dominant colour as a placeholder and then the images fade in, creating a smooth look.
How it evolved #
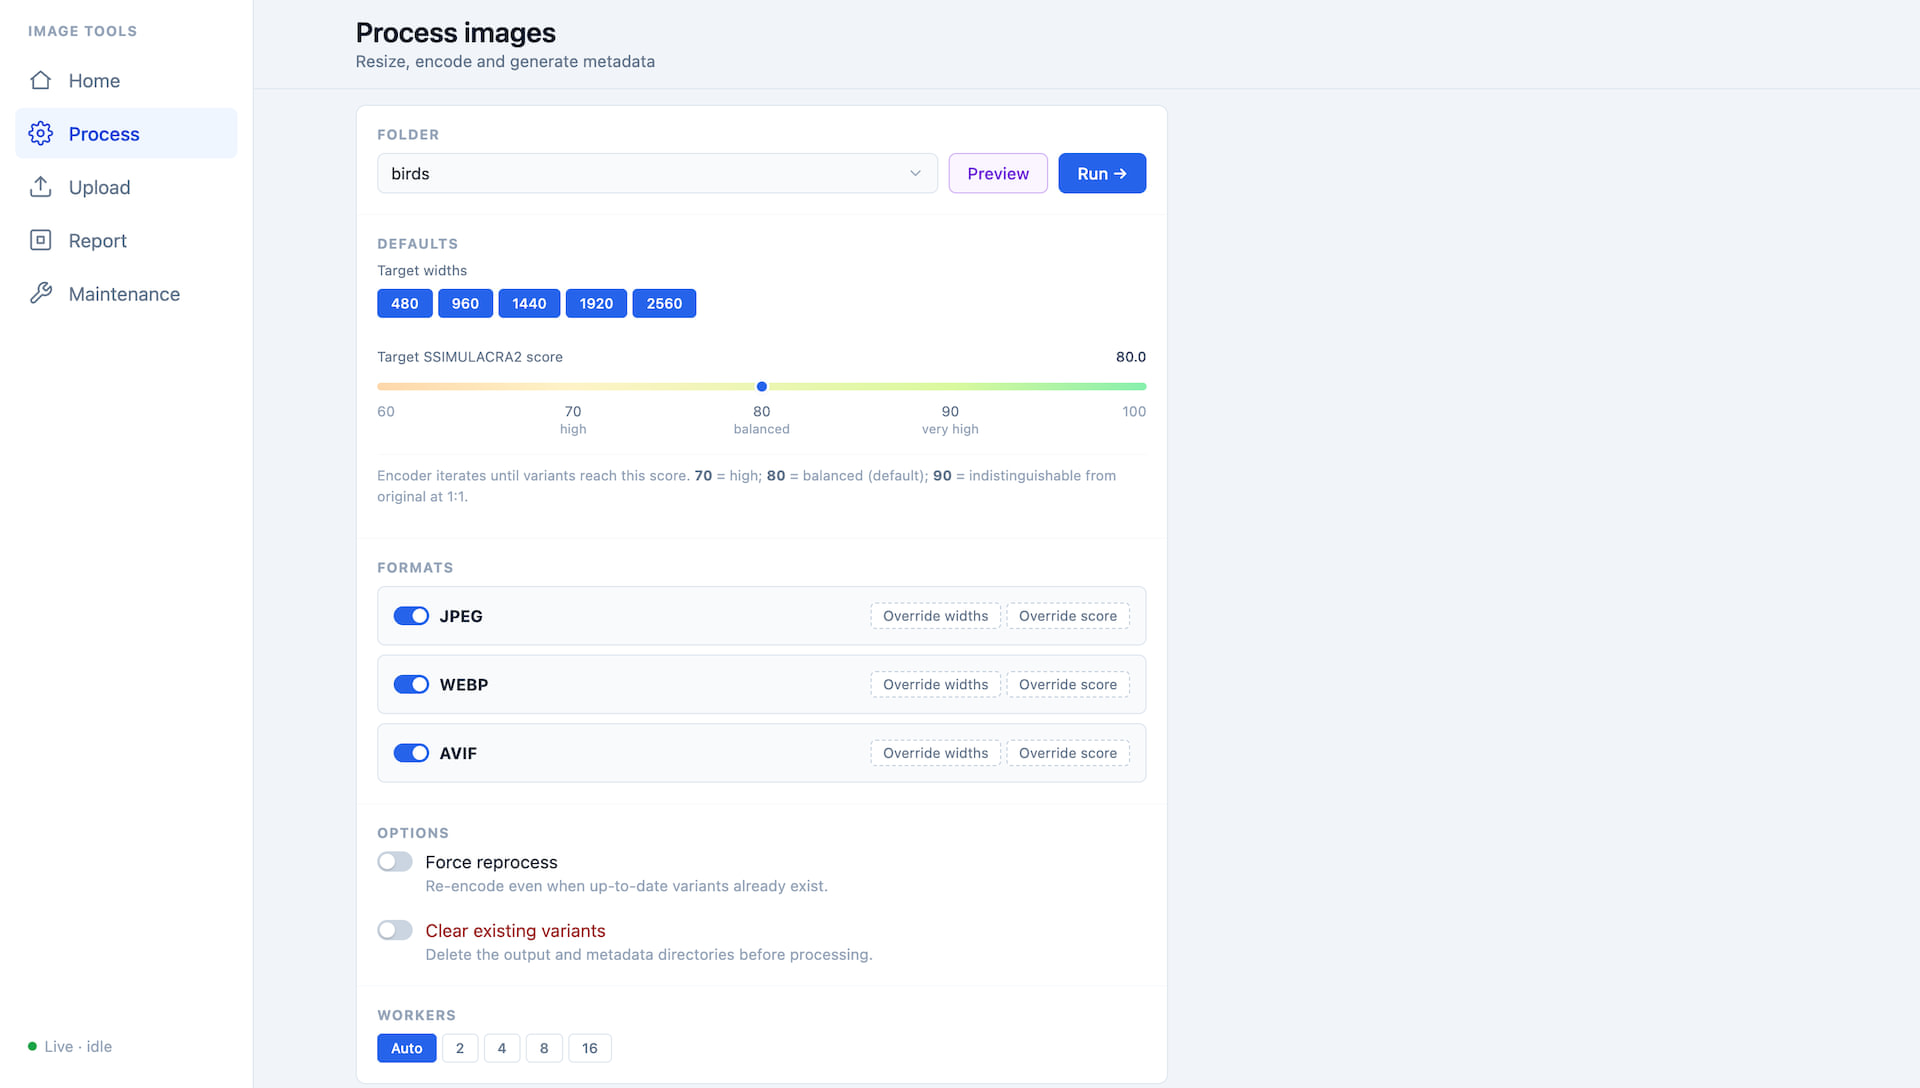
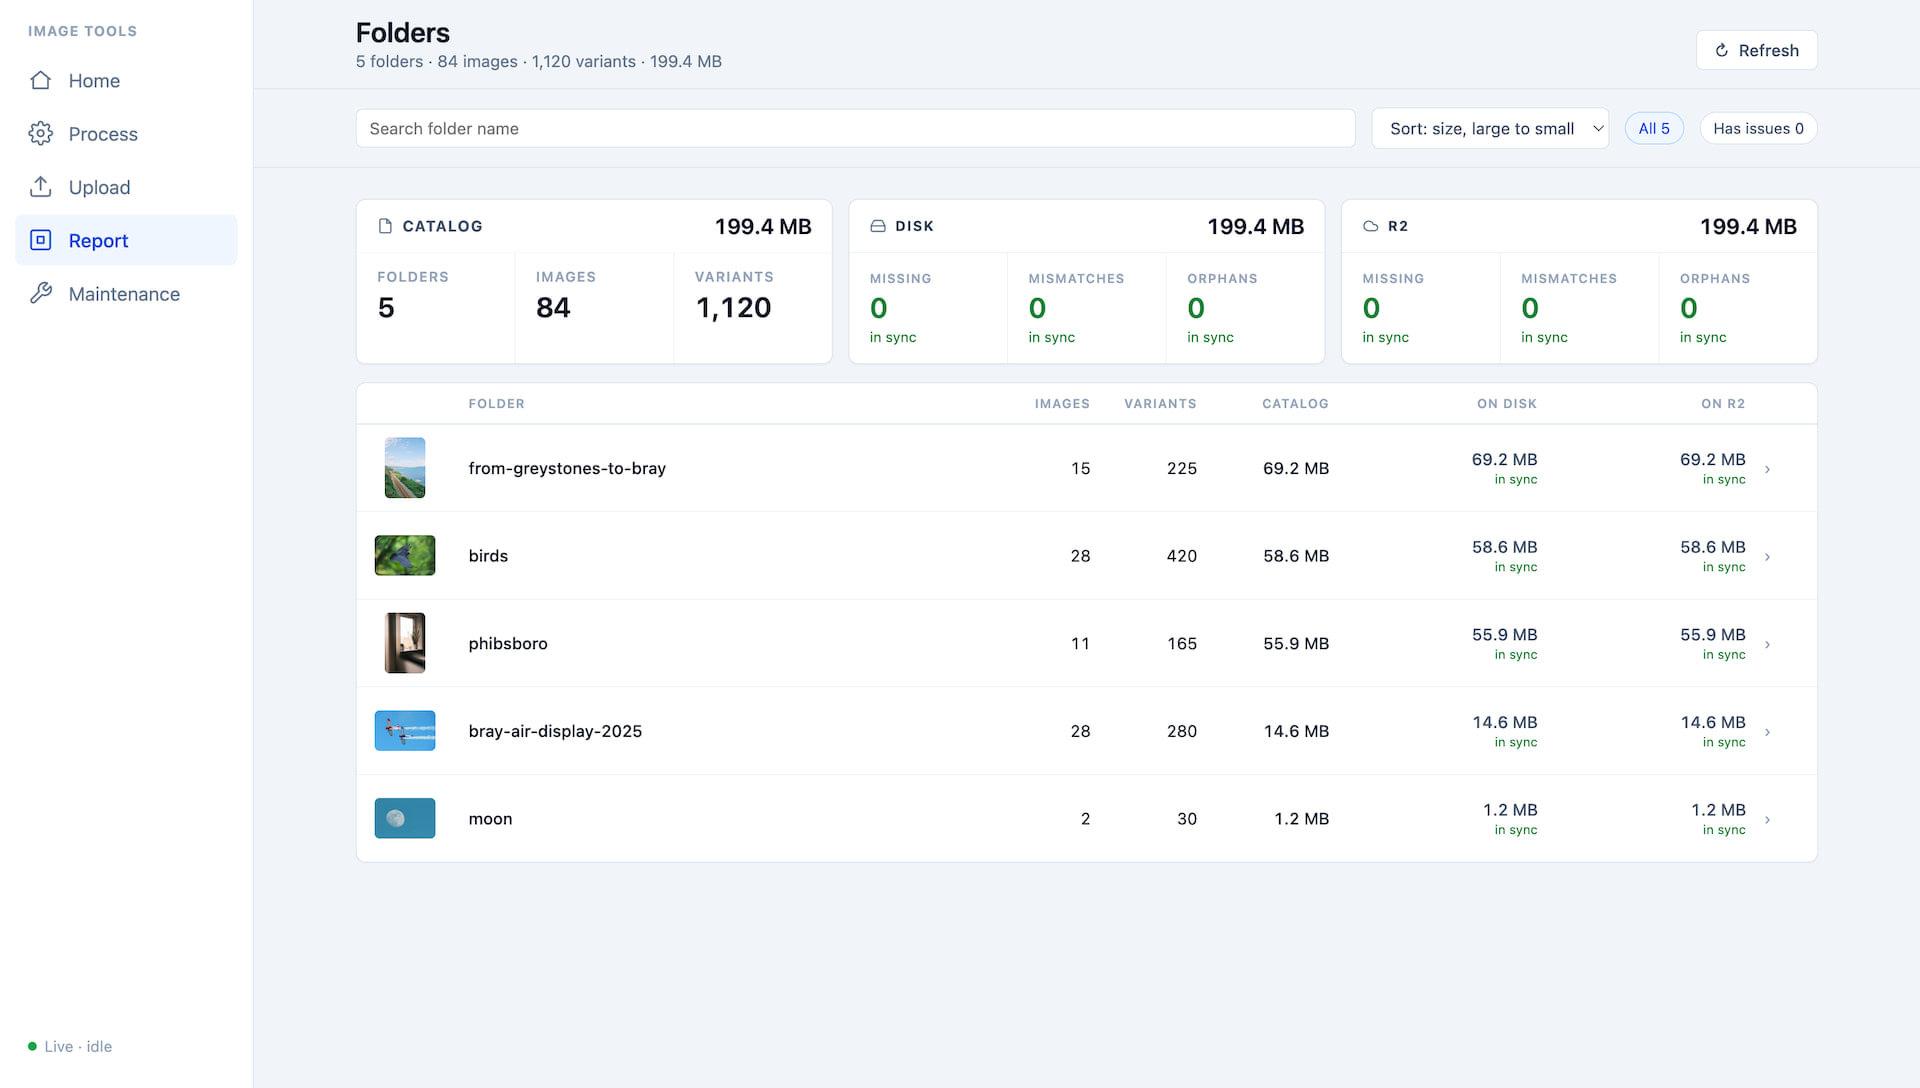
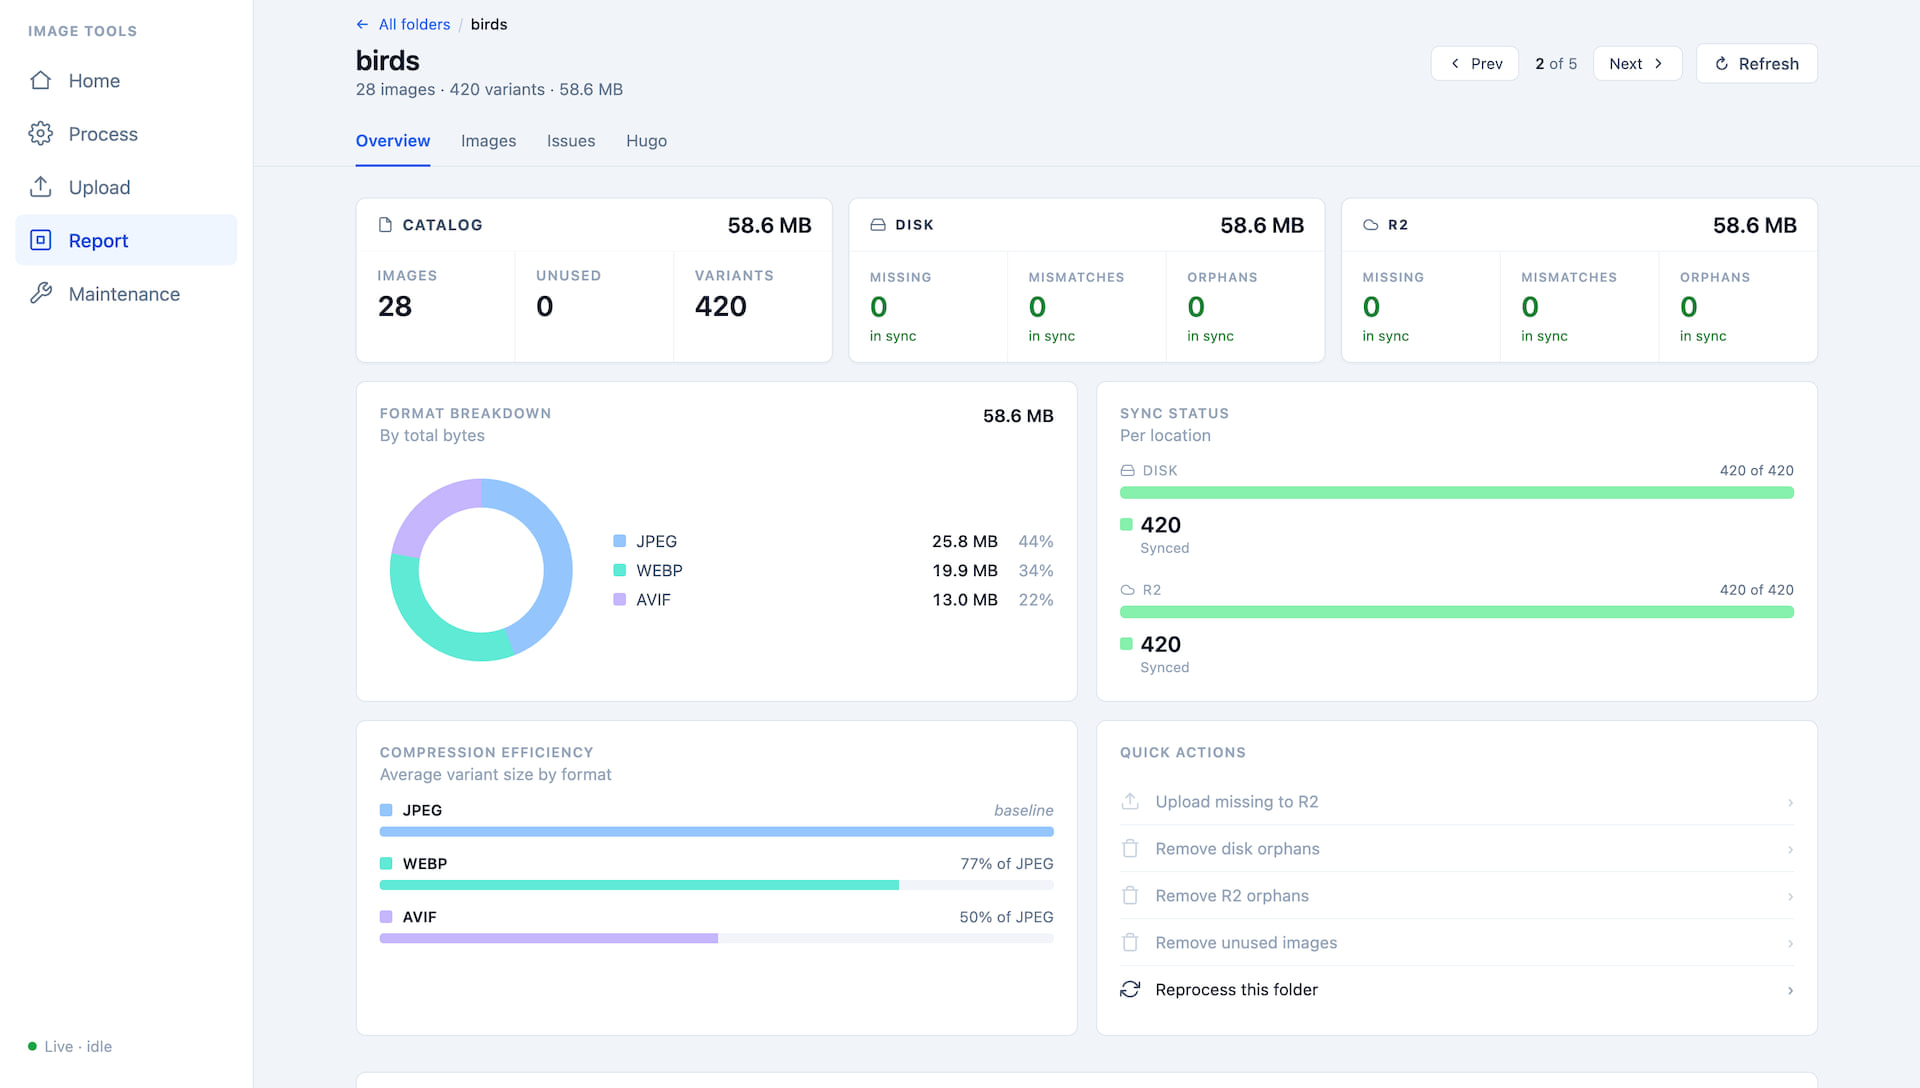
The initial version of my image processing pipeline was a set of scripts I ran manually from the command line. While it did the job, it was a bit of a hassle to use.
So I built a small web app to sit on top of it using Vue 3, Vite, and FastAPI. It’s invisible to visitors, but it’s a substantial part of the stack that lets me kick off processing jobs, review per-image metadata and SSIMULACRA2 scores, upload to R2, and track down orphaned files without touching the terminal.
Galleries and journal #
I found two ways to present my photos:
- Gallery
- Timeless and curated.
- Each one is a deliberate set of images built around a subject, a location, or an event, chosen to work together as a set.
- Journal (coming soon)
- Entries are dated and more open.
- They might hold my best frames from a particular day, photos I like but haven’t found a home for yet, or simply a record of what I was seeing. It’s a less filtered, more continuous space.
Layouts #
I’ve built three layouts for displaying photos.
Justified #
The justified layout is what I use for most galleries, similar to Flickr and Google Photos. It’s built on top of a pure-CSS technique described by xieranmaya in this post.
The idea is to give each image a flex-grow value proportional to its aspect ratio. The images then naturally fill each
row at a uniform height, preserving their original framing, without cropping or distorting.
While I always prefer CSS for layout, to keep the last row consistent with the rest of the grid, I added a script that checks how much space remains after the images are laid out:
- If the last row is almost full, the images expand to fill the remaining width as normal.
- If the last row is mostly empty, the images are capped at a fixed height to match the row immediately above.
This preserves the visual balance of the gallery from top to bottom.
Pattern #
The pattern layout follows a row structure I define: how many columns per row, how many images stacked in each column. The column widths work themselves out during build time, so every column in a row ends at the same height, with no cropping.
I plan to use it extensively in the journal when it comes live.
Grid #
The grid arranges photos in uniform columns at a fixed aspect ratio, similar to Instagram. Two, three, or four columns, configurable per gallery.
I honestly haven’t found a use for it yet.
Site status #
I keep a site status page as a snapshot of the site’s technical state: deployment details (environment, branch, commit, and build time), dependency versions, and content stats broken down by section.
Each dependency is checked against its latest published release, with an indicator showing whether it’s current or out of date.
This site status page is mostly for my own reference, but I like having it visible.